
Part A: Relying Party Trust Configuration
Steps for adding Mentis as Relying Party Trust to ADFS are similar for staging and production implementations.
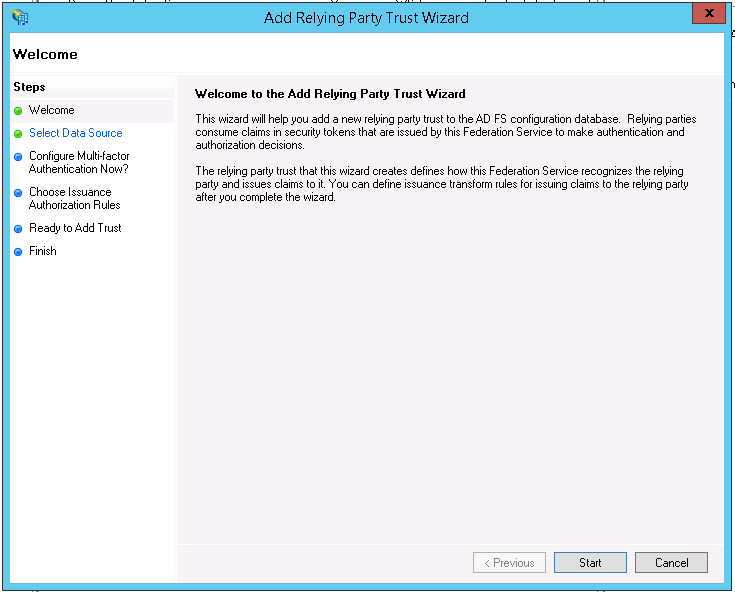
Step 1: Open Add Relying Party Trust wizard
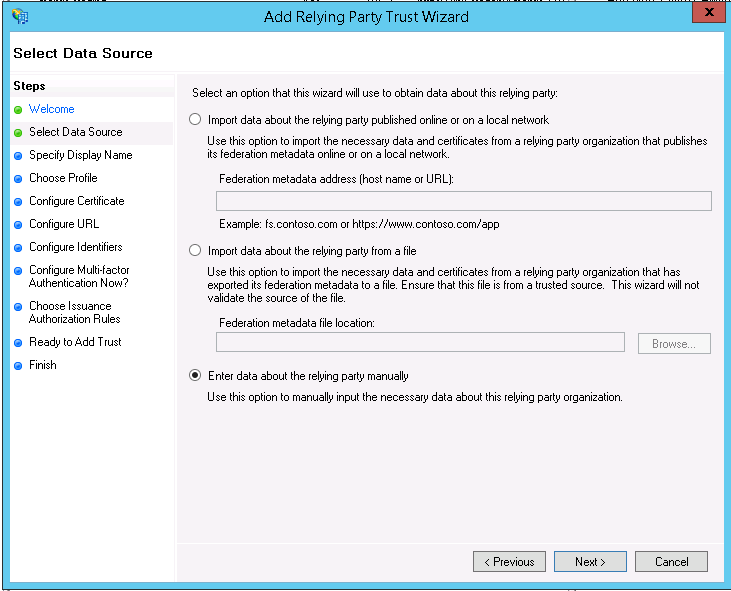
Step 2: Select Data Source
Select ‘Enter data about the relying party manually’.
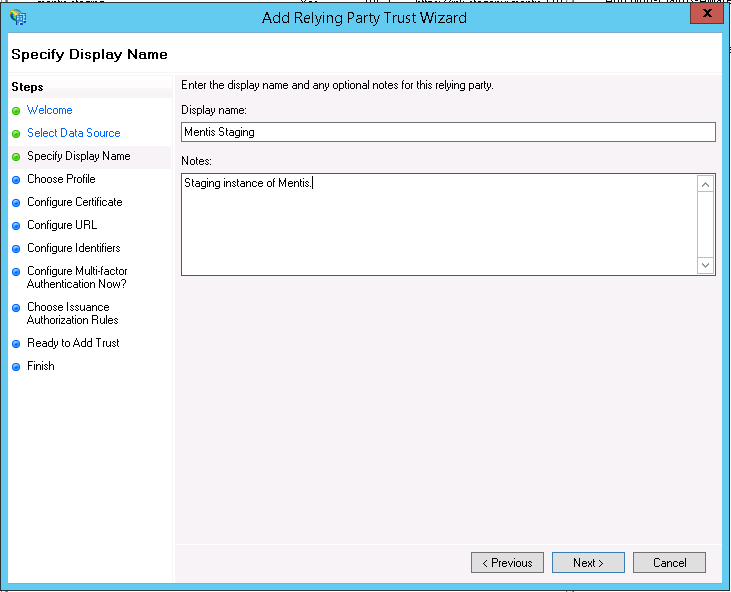
Step 3: Specify Display Name
Give Display name and description as per your choice.
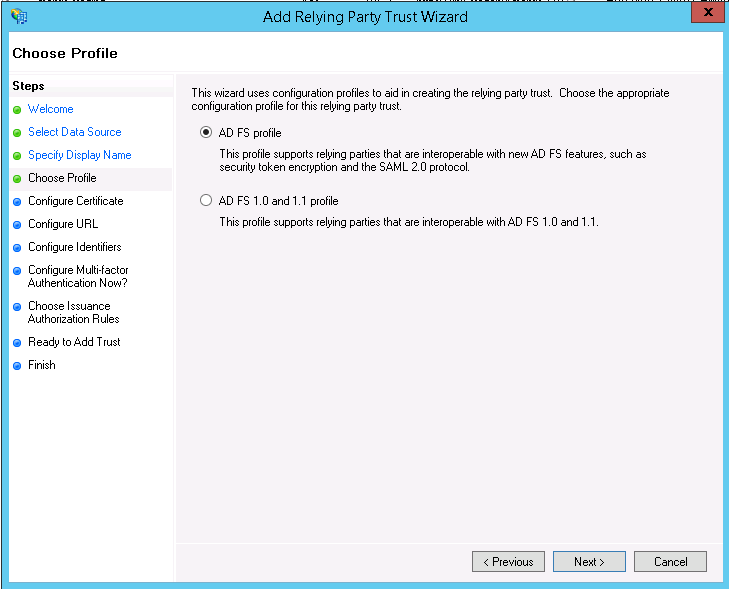
Step 4: Choose profile
Select AD FS profile.
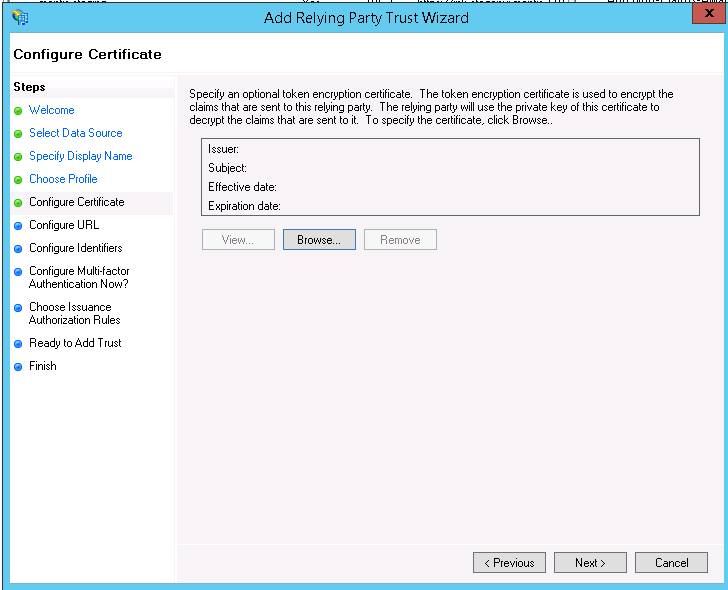
Step 5: Configure Certificate
Add optional token certificate. In case it’s used, we would require private key for it to decrypt the claims.
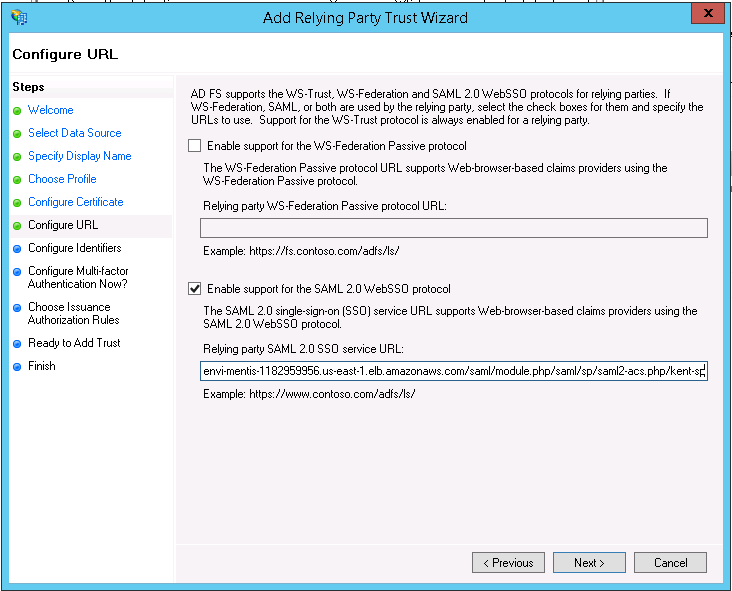
Step 6: Configure URL
Select ‘Enable support for the SAML 2.0 WebSSO protocol’. Add Relying Party SAML 2.0 SSO service url.
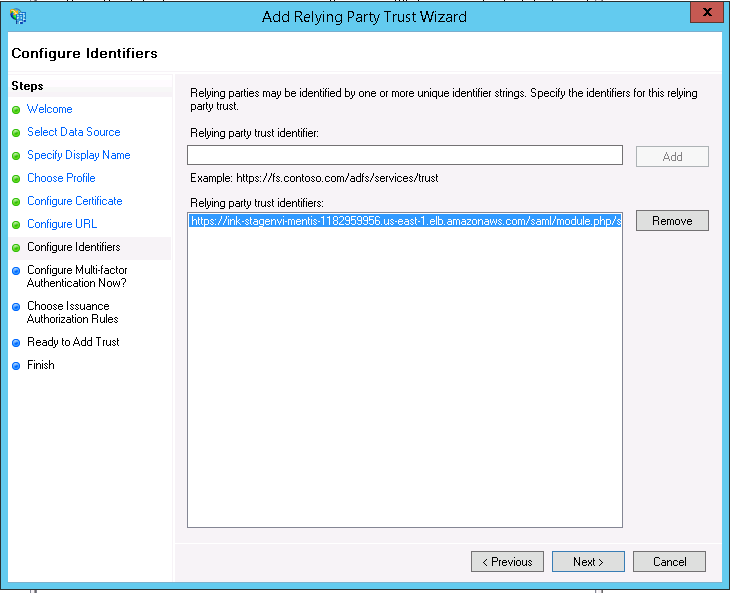
Step 7: Configure Identifiers
Add relying party trust identifiers.
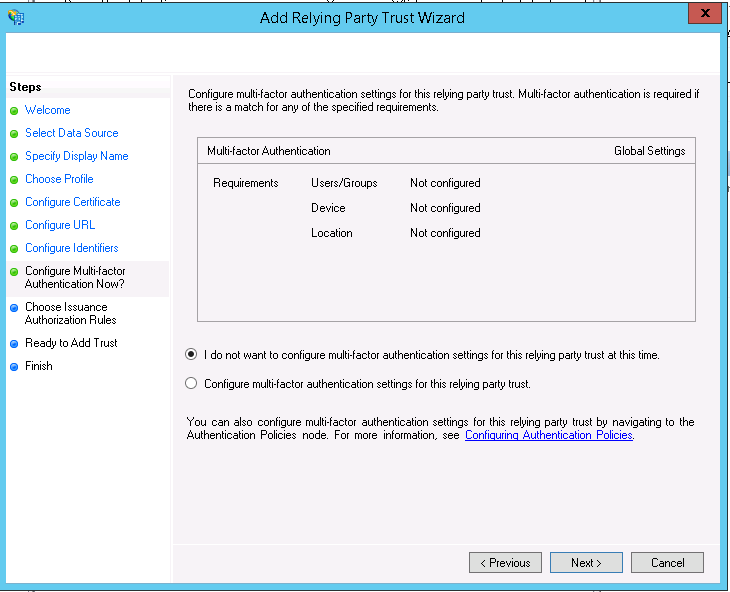
Step 8: Configure Multi-factor Authentication Now?
Select ‘I do not want to configure multi-factor authentication for this relying party trust at this time’.
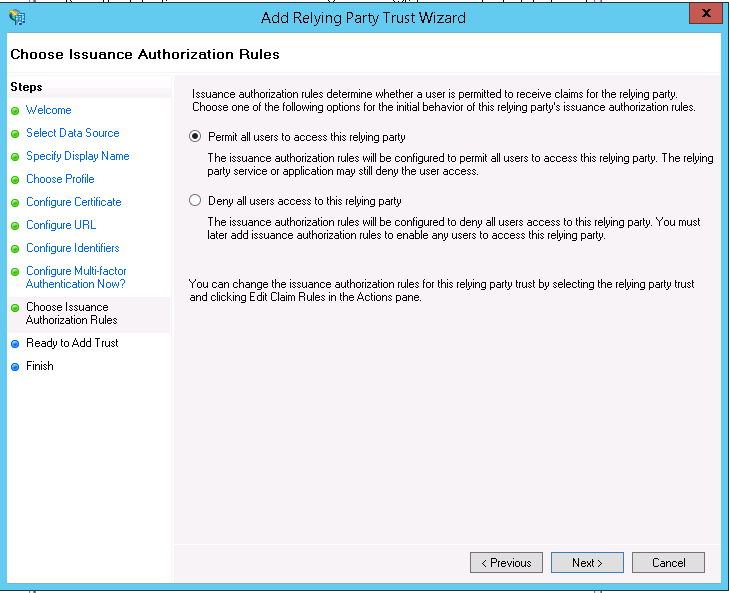
Step 9: Choose Issuance Authorization Rules
Select an option as per the policy followed at your institute. Default is ‘Permit all user for this relying party’.
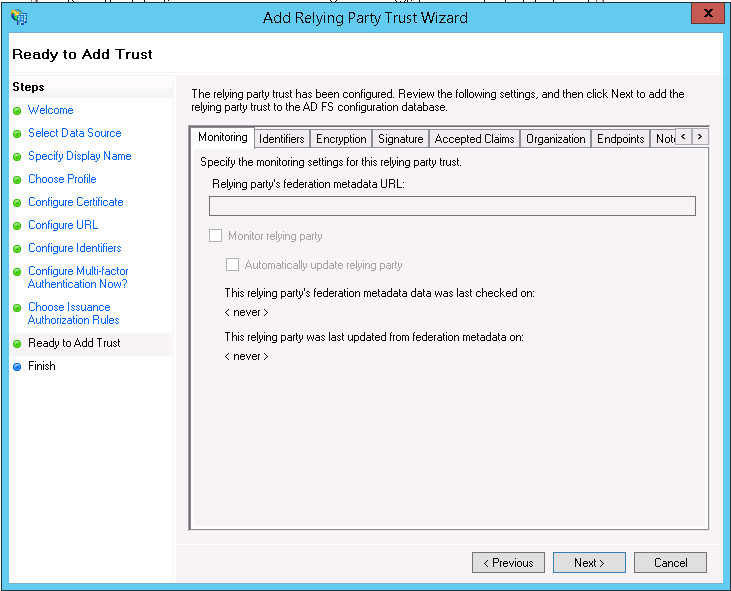
Step 10: Ready to Add Trust
You can do other optional settings or modify existing ones in this screen.
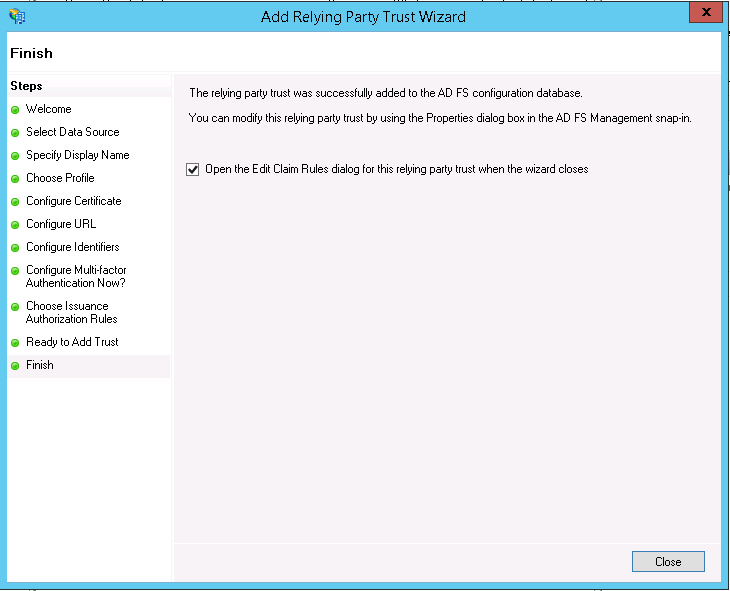
Step 11: Finish
Mentis will be added as relying party trust to your AD FS configuration database after this step. If you need to alter/verify properties of this relying party trust, please check the option provided in this screen.
Part B: Edit Claim Rules
Once the relying party trust has been created, you can create the claim rules and update the RPT with minor changes that aren't set by the wizard. By default the claim rule editor opens once you created the trust.
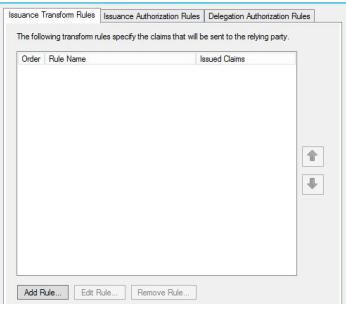
Rule 1:
To create a new rule, click on Add Rule. Create a Send LDAP Attributes as Claim rule.
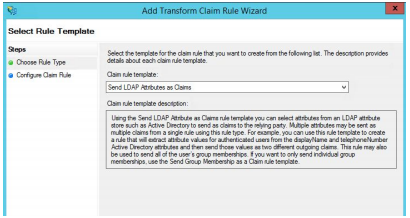
On the next screen, using Active Directory as your attribute store, do the following:
1. From the LDAP Attribute column, select E-mail Addresses.
2. From the Outgoing Claim Type, select Name-ID.
3. Then, from the LDAP Attribute column, select E-Mail Address and from Outgoing Claim Type, select E-Mail Address.
Repeat step #3 for all other required attributes (Given Name, Surname, GUID).
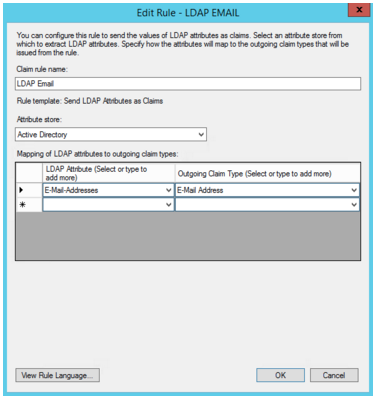
Click on OK to save the new rule.
Part C: Adjusting the Trust Settings
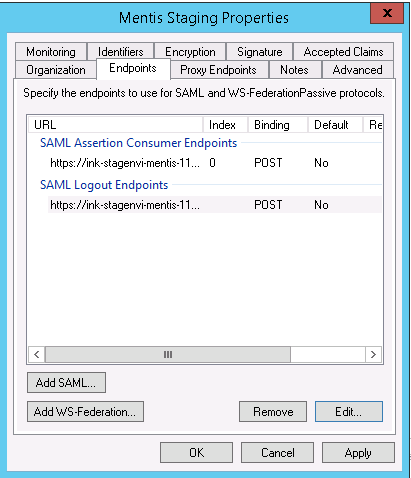
You still need to adjust a few settings on your relying party trust. To access these settings, select Properties from the Actions sidebar while you have the RPT selected.
Step 1: SAML Logout Endpoint
In the Endpoints tab, click on add SAML to add a new endpoint.
1. For the Endpoint type, select SAML Logout. For Binding, choose POST.
2. For the Trusted URL add the respective staging or production URL.
3. Leave the Response URL blank.
4. Confirm your changes by clicking OK o the endpoint and the RPT properties.
Step 2: Advanced Tab
In the Advanced tab, switch from SHA-256 to SHA-1.
You should now have a working RPT for Mentis.
Note: For Production Implementation - Once the RPT settings have been made, please send us an email at support@inknowledge.com so that we begin testing. Post successful testing and go-live, we would recommend, you to disable the Mentis Staging RPT. We would, however, request that you to retain a backup of the RPT settings in the event we have significant changes to your environment that require retesting in staging.
Please always consult with your Mentis Implementation Guide for the latest up to date links.
Comments
0 comments
Please sign in to leave a comment.