
ELC in Mentis ships with certain core authorization statuses that allow you to track the state authorization progress for your programs. However, you have an option to customize these statuses to fit your unique internal requirements.
Please note that only the ELC App Admin can update authorization status.
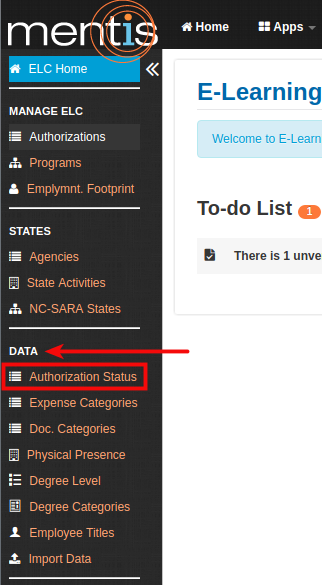
Accessing the Customize Authorization Status Page
Once inside the ELC app, select Authorization Status present under Data from the sidebar.
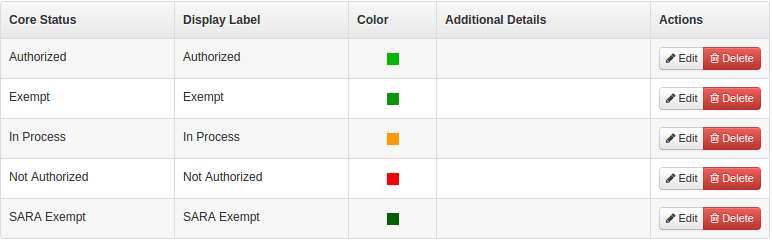
You will see the list of the current statuses that are available with the default mappings. You can now either edit the existing statuses to provide your customized label text or add a new status. The display label is what is then available in all drop-down forms when editing the authorization status and the label along with the selected color is visible on reports and explore.
Editing an Authorization Status
You can edit an Authorization Status using Edit button present under Actions. You can then edit the Display Label and the color for the selected core status.

Please note that any changes done here are immediately indexed and applied to your forms, reports and explore.

(1) In Core Status, you need to select status from the drop-down list of core statuses available in the system. These are pre-configured statuses that are setup to work in a pre-defined manner.
(2) In Display Label, you need to change the display label. This allows you to overwrite the label of the core status with what suits your needs. For example, the display label of SARA exempt, can be replaced by Authorized via NC-SARA membership.
(3) In Color, you can change the hexadecimal value of the color code. Please click on the link below (Check here for color codes) to use a color picker to get codes for different colors.
(4) In Additional Details dialog box, you can add additional details for a particular authorization status. This allows a customized text to be displayed under a See Details link for the authorization status and can be used to convey additional information to your viewers when they are viewing programs associated with the selected authorization status.
(5) Click Save to finalize the changes.
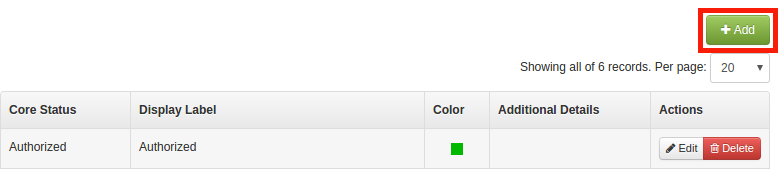
Add a new Authorization Status
You can also map more than one customized display label to the same core status. This allows you to use the functionality of the core status but create additional statues to be used by ELC.
1. To add a new authorization status, click on Add button present on the right-hand side.
2. In Create a new Authorization Status, you need to add details to the fields numbered below (please refer the section above for details of these fields)

Deleting an Authorization Status
You can also delete an existing authorization status. However, deleting an authorization status only deletes any customizations made by you. The system automatically uses the defaults configured in the system for the core statuses and they continue to remain available for your use in forms and will display using the system defaults in reports and explore.
Comments
0 comments
Please sign in to leave a comment.